
Textures
This demo illustrates some possibilities to add textures to geometries within Javaview. We will start with a blank icosahedron and add a texture in two different ways.Subsection: Navigation
You can open a new display in the context menu. On top of the new display you now have the main menu, which you can use to open the individual info panels and other options and functions of Javaview.
| Summary | |
|---|---|
| Translate | hold t-key and left mouse button pressed and move mouse |
| Zoom | hold s-key and left mouse button pressed, move mouse vertically to zoom |
| Rotate in Orbit Mode | hold o-key and left mouse button pressed, move mouse to rotate |
| Preselect | click right mouse button in viewer window to open context menu and select navigation mode |
| Open New Display | click right mouse button in viewer window to open context menu and select "New Display" |
Subsection: Adding a Texture
| User Activity | |
|---|---|
|
|
Now we will add a texture to the existing geometry. In order to do that, we first need to open the control panel. You can do that by opening the context menu with a click of the right mouse button and select or by pressing CTRL-i. Now you can reach the main menu (if you opened a new display, you also have the main menu there).
In the main menu go to --> . There you have several different methods to add a texture to the geometry.
For now select . This method will project the geometry onto the XY-plane, then map the texture on the projection.
Now open the texture info panel from the main menu, --> --> or press CTRL-t.
You can enter the desired texture in the textfield . In the textfield a path to a file on the server or any valid URL can be entered. Try the value "figures/zebra.jpg" as an example.
If you take a look at the texture now, you will notice that the texture is strongly contorted on some faces. This is caused by the projection on the XY-plane. The faces close to perpendicular to the plane will be strongly contorted, which carries on to the texture.
In the texture panel you can take a look at the texture mapping by enabling the checkbox. There you can see how the geometry is mapped onto the texture. You can change that mapping by dragging vertices by holding the p-key pressed and clicking on a vertex.

| Summary | |
|---|---|
| Open control panel | Open the context menu with a click of the right mouse button an choose or simply press CTRL-i |
| Add texture | In the main menu, --> --> , open the texture panel in the menu Inspector -> Geometry -> Textur or press CTRL-t Enter the texture file name in the textfield . |
| View texture Mapping | Open the texture panel in the main menu, --> --> or press CTRL-t and then enable the checkbox. |
| Pick and drag vertex | While holding the p-key (or choose Pick Vertex in the context menu), click and drag a vertex. |
Alternative Method
| User Activity | |
|---|---|
|
|
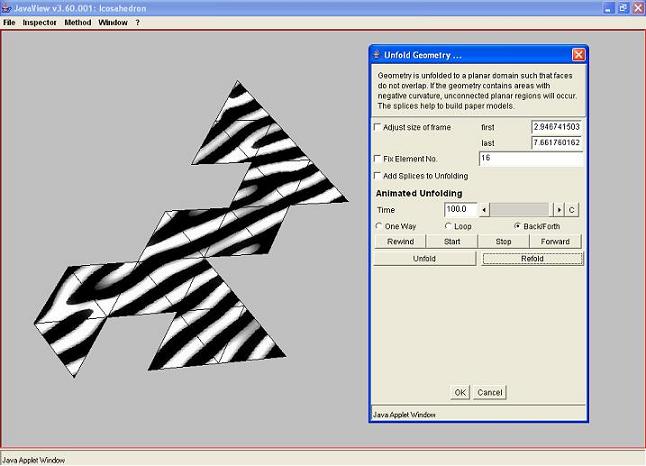
To avoid contortions on the texture, we could first try to unfold the geometry onto the
XY-plane and then add the texture. In the following we will do just that.
First you can remove the current texture in the main menu via
-->
-->
Texture.
Then we use a built-in effect of Javaview, this we will get in the main menu through
-->
-->
.
Upon that a dialog opens with which we can unfold the geometry.
At the bottom are two buttons,
and
,
those unfold and refold the geometry respectivly. With the
button you can animate the effect and stop it with the
button.
First unfold the geometry completly
(i.e the textfield has a value of 100).
Now, without closing the dialog,
add a texture just like before. Since now the texture is already flat on the
XY-plane, there will be no more contortions.
Finally, you can refold the geometry with the
button in the dialog and you will have a texture on
the geometry that is not contorted.
| Summary | |
|---|---|
| Remove texture | In the main menu, --> --> |
| Unfold geometry | In the main menu, --> --> , a dialog opens with which you can control and animate the unfolding process. |
| Animate unfolding | In the dialog control animation with the and buttons. |
|
|